## 介绍
[数据源数据集用法总结](https://my.oschina.net/u/4517014/blog/5270828)
- 支持多数据源,内置mysql、elasticsearch、kudu等多种驱动
- 可动态扩展(见下文)
## 类型
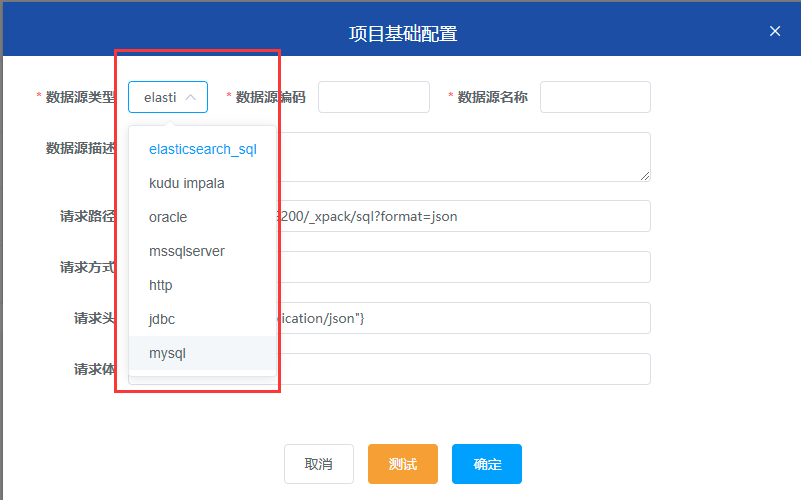
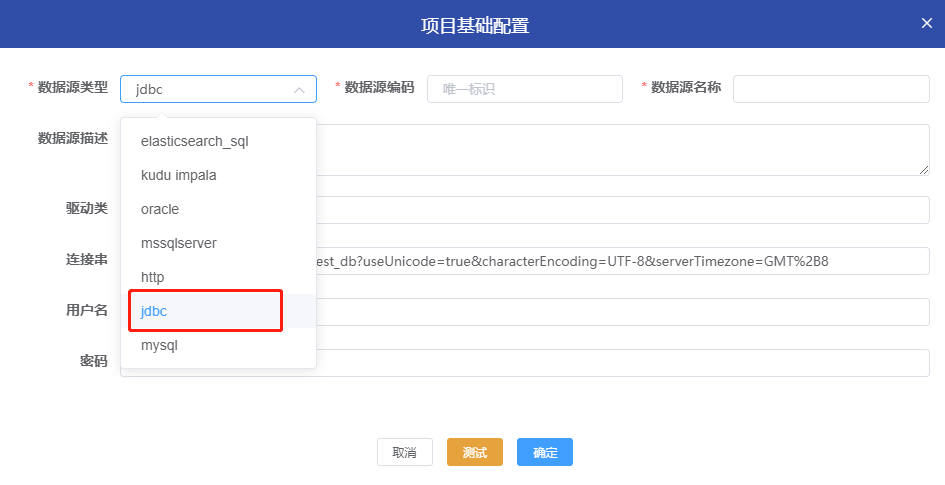
查看已有的数据源类型。
```text
可以在此页面进行新增数据源配置,也可以去数据库中增加你需要的数据源类型。
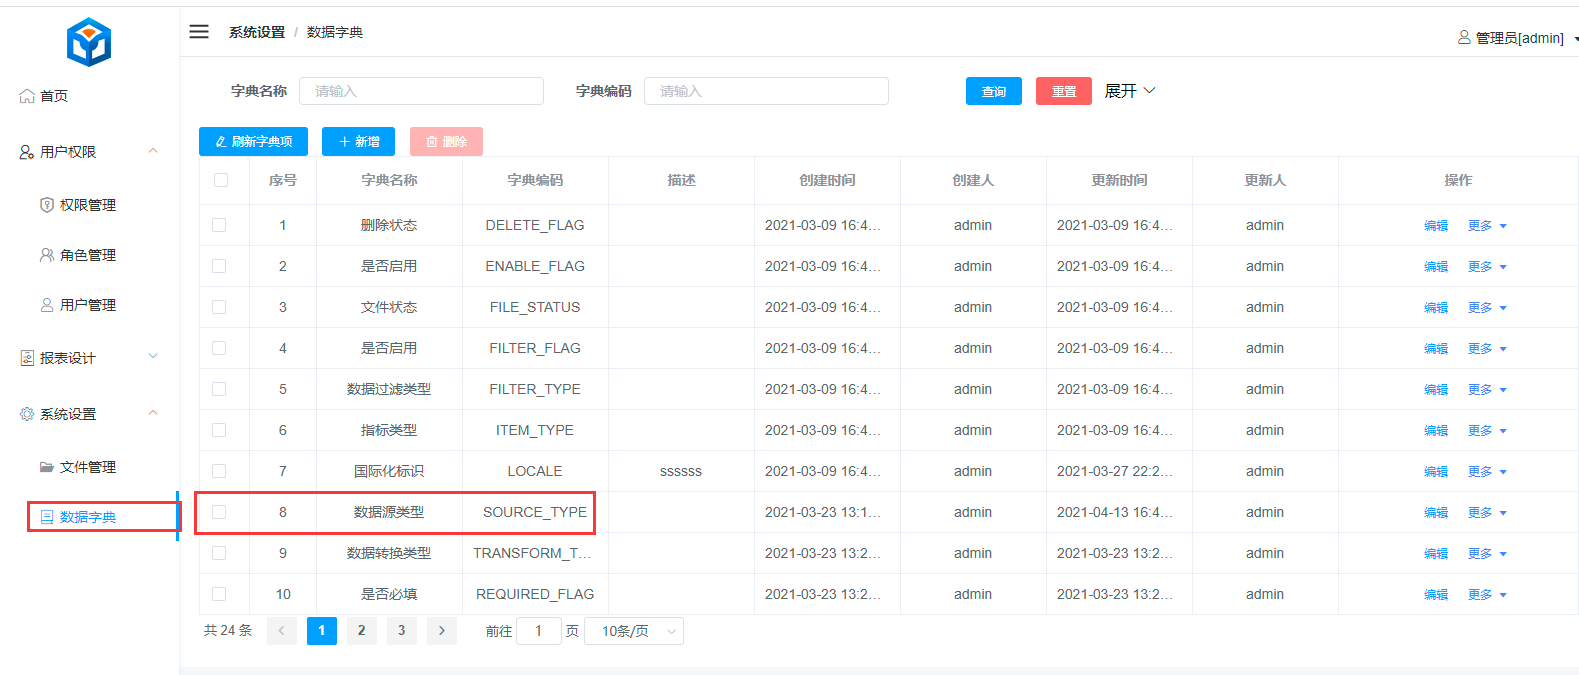
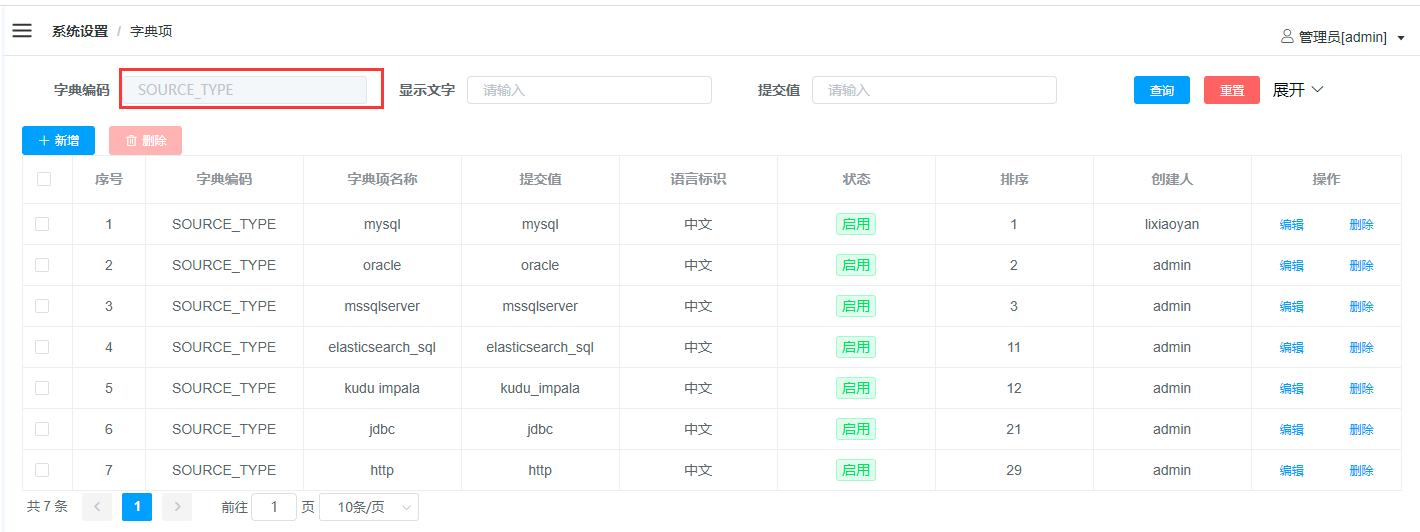
表aj_report.gaea_dict_item,字段dict_code:SOURCE_TYPE
表aj_report.gaea_dict_item, item_extend字段是下拉选择后动态表单渲染的json数据
```
## 操作
- 只有测试通过的数据源才可以保存。
## 内置数据源
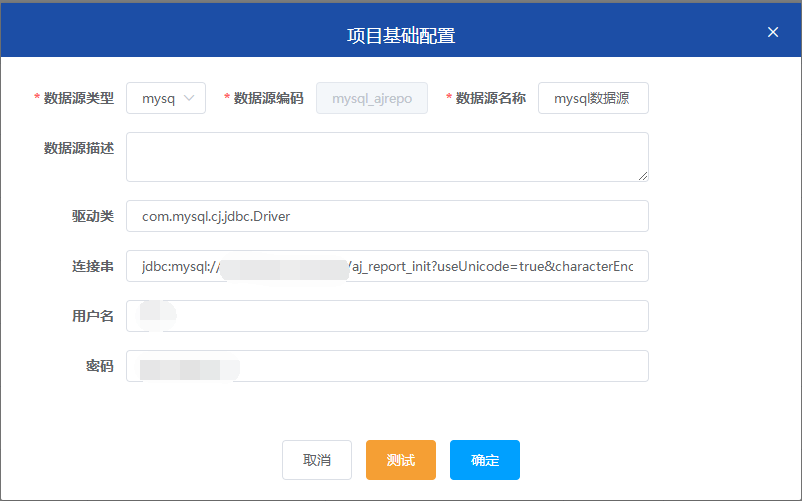
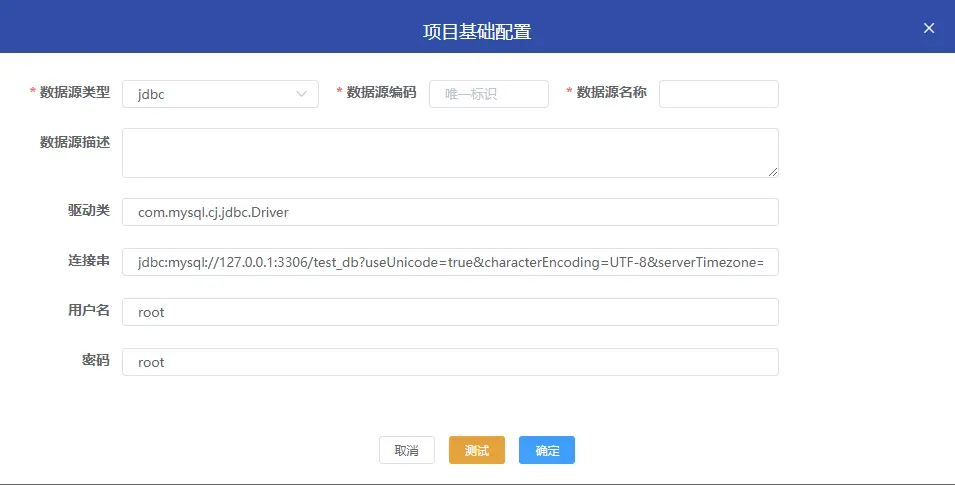
### JDBC数据源
适用于JDBC驱动类数据库,驱动类、连接串、用户名、密码必须填写正确。
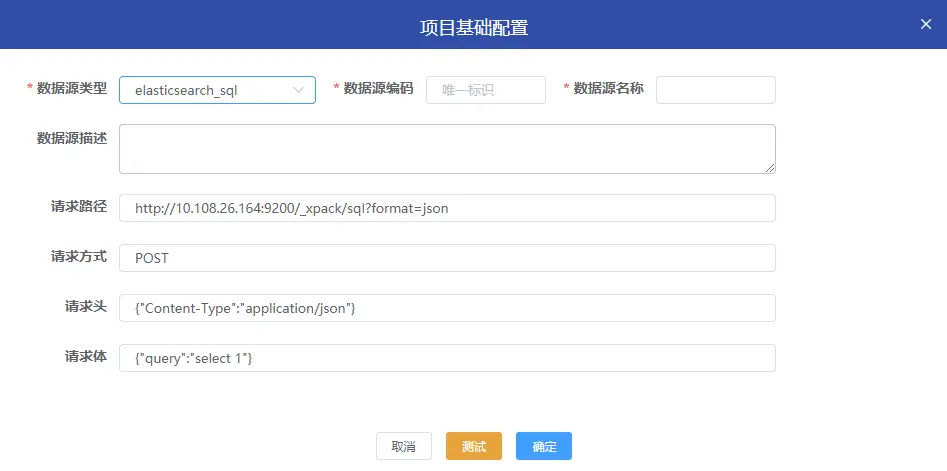
### elasticsearch_sql数据源
目前只支持 elasticsearch 的 x-pack sql。
固定写法:
- 请求路径:http://127.0.0.1:9200/_xpack/sql?format=json
- 请求方式:POST
- 请求头:{"Content-Type":"application/json"}
- 请求体:{"query":"select 1"}
### HTTP数据源
针对http,最好得返回结果是``List``,目前而言,http 数据源操作上可能过于繁琐了些。
支持请求路径和请求头中存在动态数据,采用 ${} 方式进行动态替换,具体操作看数据集的相关说明。
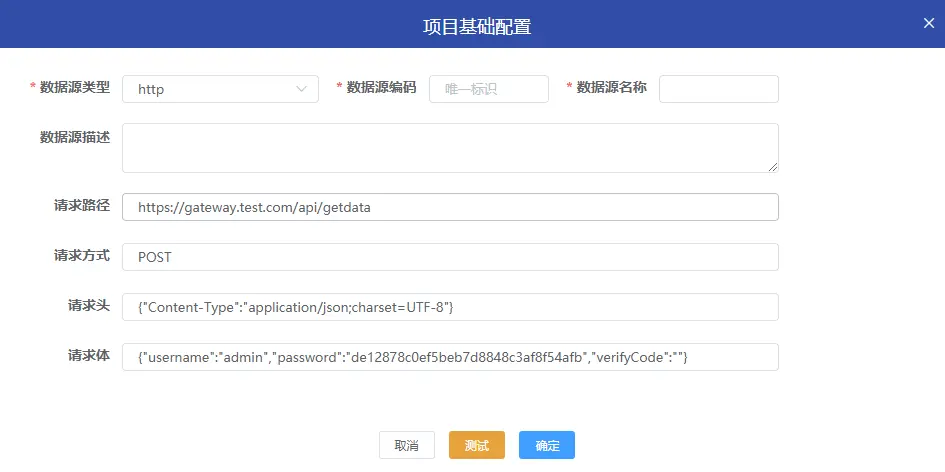
**注:** Http数据源功能已经移动到Http数据集中,原功能不变,有Http接口数据请直接使用Http数据集,请注意Http接口数据返回格式必须是Json。
## 扩展
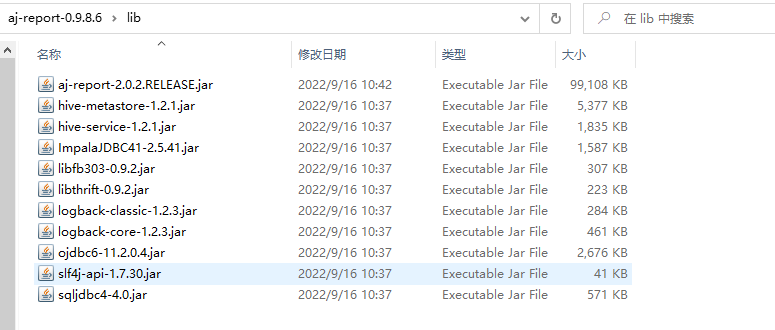
### JDBC驱动类数据源添加
**发行版**
```text
1、将jar包上传到 "aj-report.xxx/lib"目录下
2、启动项目(重启项目)
3、前端页面数据源类型选择"jdbc",填上对应的驱动类、连接串、用户名密码
```
**源码**
源码推荐使用第二种方式。
- 第一种,在report-core/lib目录下添加
按照同样的层级将驱动包放置,使用build.sh脚本进行打包,前端页面数据源类型选择"jdbc"
,填上对应的驱动类、连接串、用户名密码。
**注意:** 此方式添加的jar包只能使用build.sh进行编译后才会生效。
- 第二种,在pom.xml中添加
使用build.sh脚本编译或者maven package编译都可以,前端页面数据源类型选择"jdbc"
,填上对应的驱动类、连接串、用户名密码。
### 非JDBC驱动类数据源添加
例如原生ES、Redis之类。
```text
1、在源码中编写解析代码(datasource)
2、生成数据字典,可在数据字典页面找到"数据源类型",在"操作"栏中选择"编辑字典项"
3、添加对应驱动包
```